Difference between revisions of "Mounting Rotary Tool (Driller)"
(Created page with "The [http://www.youbot-store.com/youbot-store/youbots/accessories/rotary-tool-driller Rotary Tool (Driller)] sold from the youBot-Store is produced using Industrial 3D Printin...") |
|||
| (One intermediate revision by the same user not shown) | |||
| Line 8: | Line 8: | ||
== Mount the Rotary Tool == | == Mount the Rotary Tool == | ||
| + | First step is dismounting the default gripper as described [[Dismounting the default gripper |here]]. | ||
| − | + | Then make a knot at the gripper's power cable to work as a cable strain relief, if the cable gets accidentally stretched. The knot should be 2-3cm from the electronics at the rotary tool's side. | |
| − | + | ||
| − | + | ||
| − | + | ||
| − | + | ||
| − | + | ||
| − | + | ||
| − | + | ||
| − | + | ||
| − | + | ||
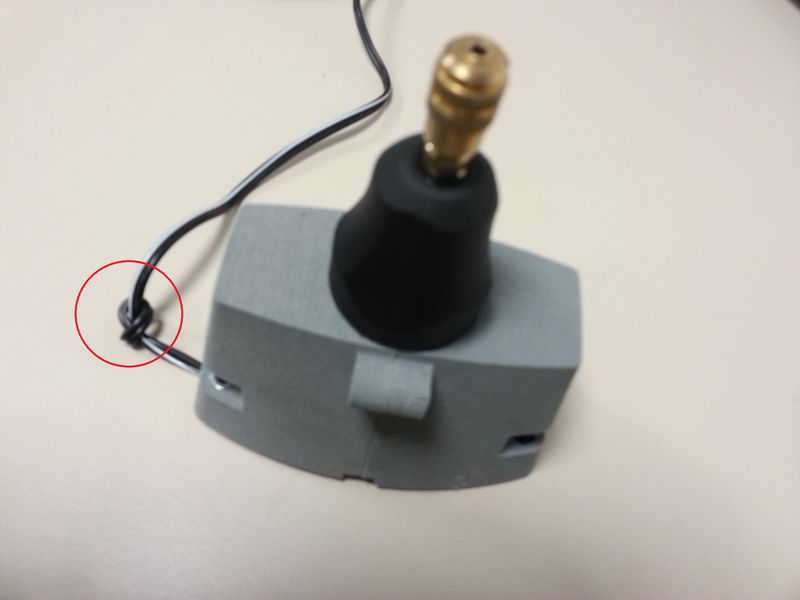
[[File:RotaryTool_Knot.jpg |thumb|center| 800px|Knot at the power cable acting as a strain relief]] | [[File:RotaryTool_Knot.jpg |thumb|center| 800px|Knot at the power cable acting as a strain relief]] | ||
| Line 33: | Line 25: | ||
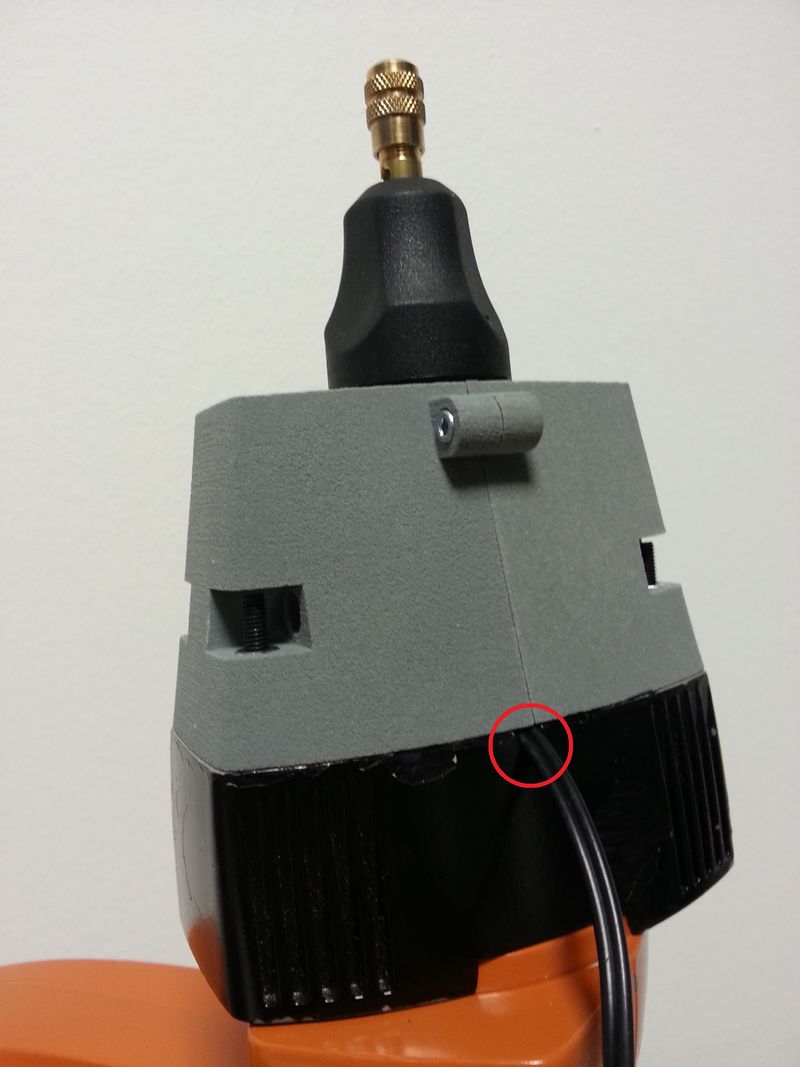
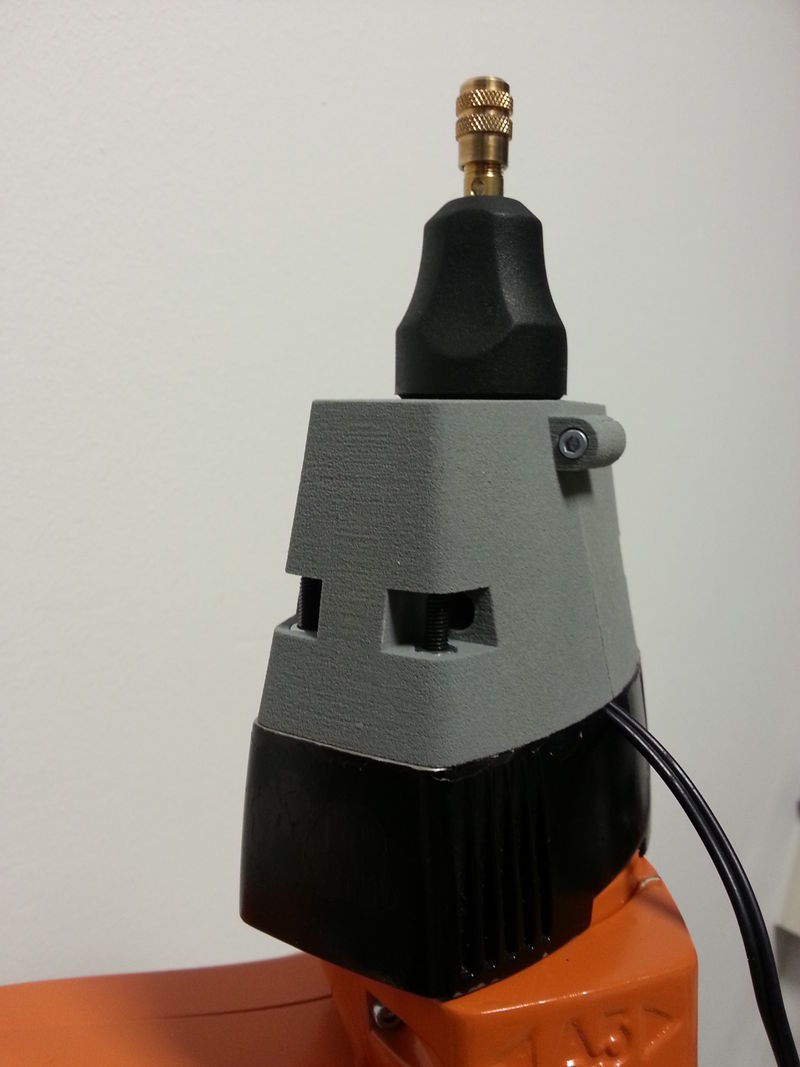
[[File:RotaryTool_FinalMount.jpg|thumb|center| 800px|All screws in place and the gripper mounted in position]] | [[File:RotaryTool_FinalMount.jpg|thumb|center| 800px|All screws in place and the gripper mounted in position]] | ||
| − | |||
== Attach power to the Rotary Tool == | == Attach power to the Rotary Tool == | ||
| Line 74: | Line 65: | ||
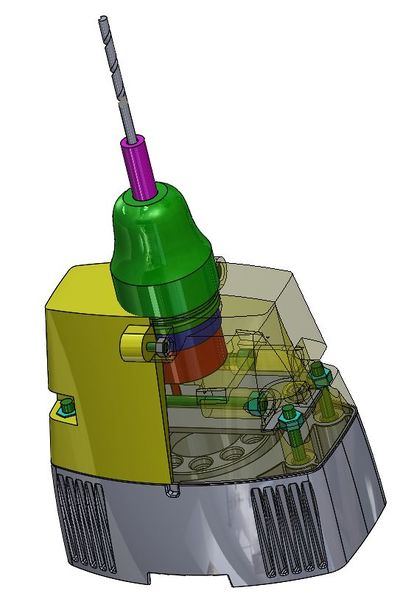
[[File:RotaryTool_Differences with the Gripper.png|thumb|center| 800px|Dimensions of the Rotary Tool]] | [[File:RotaryTool_Differences with the Gripper.png|thumb|center| 800px|Dimensions of the Rotary Tool]] | ||
| + | Go back to [[Accessories | Accessories]] | ||
''Corrections, suggestions, and new documentation should be posted to the [http://www.youbot-store.com/forum/ Forum].' | ''Corrections, suggestions, and new documentation should be posted to the [http://www.youbot-store.com/forum/ Forum].' | ||
Latest revision as of 17:52, 9 February 2015
The Rotary Tool (Driller) sold from the youBot-Store is produced using Industrial 3D Printing Technology to achieve its accuracy in shape, but on the other hand it is based on plastic and therefore:
- is NOT suitable for heavy duty applications
- its screws should NEVER be tighten to the maximum
otherwise it might result in a permanent hardware failure!
Contents
Mount the Rotary Tool
First step is dismounting the default gripper as described here.
Then make a knot at the gripper's power cable to work as a cable strain relief, if the cable gets accidentally stretched. The knot should be 2-3cm from the electronics at the rotary tool's side.
Keep the knot inside the rotary tool housing and use one of the two holes at the side of the 5th joint to get the cable out.
You should take care also of the old gripper cable.
Now use the screws that came with the rotary tool, and not the ones of the gripper, to mount it at the position of the old gripper.
You should not tighten the screws too much, because the gripper might brake.
First bolt all screws in place and then bolt the completely. When finished, the gripper will be securely mounted.
Note: It is easier to mount the gripper, if you bolt the rest two screws on different sides.
Attach power to the Rotary Tool
youBot System with Platform
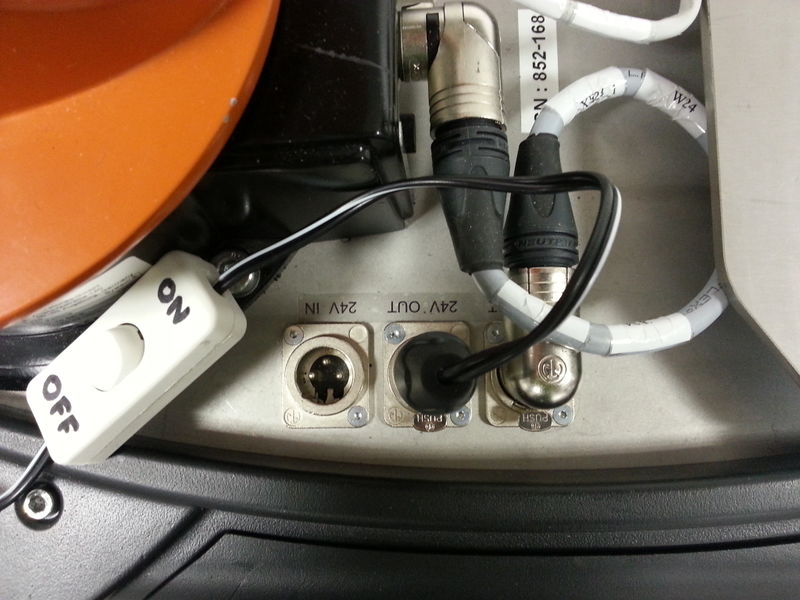
Attach the power connector using one of the two available "24V Out" ports of the platform. Then switch ON the motors of the youBot and now you should be able to switch ON/OFF the rotary tool from its switch.
youBot System only with arm (without platform)
To power the rotary tool and the arm simultaneously, you need to purchase a special split cable.
The cable is called "XLR Y Cable (1-XLR-male / 2-XLR-female)" and has one (1) XLR male to two (2) XLR female connectors.
Then you can plug the female side at your power supply and the two males to power the arm and the rotary tool.
Modify Software
- Modify the arm config file
- $ gedit youbot_driver/config/youbot-manipulator.cfg
- Find the lines
[Gripper]
EnableGripper = true
DoCalibration = true
- and change it to
[Gripper]
EnableGripper = false
DoCalibration = false
Dimensions of the Rotary Tool
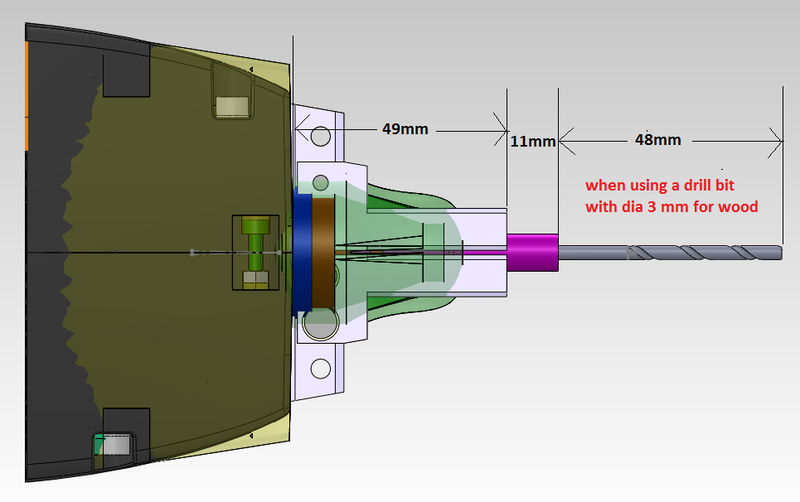
The center of the tool is at the center of the 5th Joint.
Regarding the lenght, refer to the picture below where the rotary tool is compared with the standard youBot gripper.
Go back to Accessories
Corrections, suggestions, and new documentation should be posted to the Forum.'
